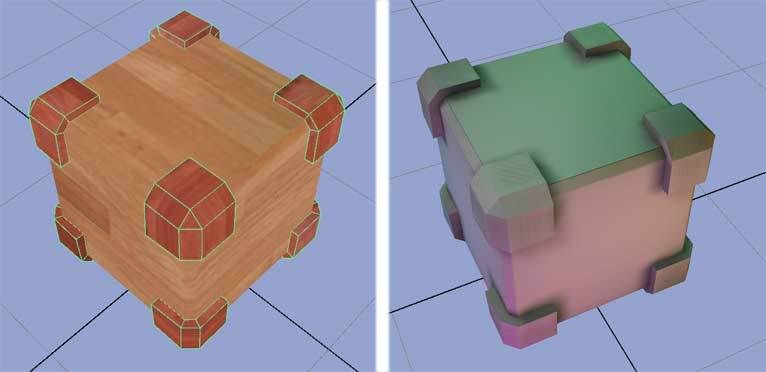
As you can see its a cube with some corner edges kept separate (left: color map, right: lightmap).
Both geom nodes contain 2 uv sets, one for color and one for the lightmap. The uvsets for color (both named ‘color’ in Maya) have many polygons using the same texture space while the uvsets for the lightmap (both named ‘lightmap’) give each polygon its own unique texture space. This allows me to tile the color map across many polygons while accurately retaining the shading from the lightmap.
So to recap I have 2 geom nodes in a single unanimated .egg file:
-cube, containing 2 uv sets (color, lightmap)
-corners, containing 2 uv sets (color, lightmap)
It appears I may also have a third, unused uv set on each geom node. This was created accidentally and Maya wouldn’t delete it when I tried. I figured it wasn’t a big deal so I left it there.
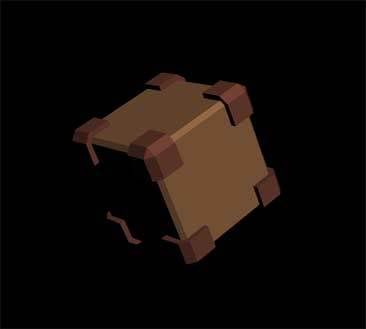
I’ve managed to call the separate geom nodes and apply the textures, but I think they are using the empty set (the one I couldn’t delete) because the textures are displaying as a solid color from the respective textures (as if one pixel of the texture is stretched across the entire object).
I tried defining which uv set to use for each texture stage, but it doesn’t seem to have an effect (my no doubt n00bish code):
      #loading the textures
      tex1=loader.loadTexture('../models/maps/lightmap.tif')
      tex2=loader.loadTexture('../models/maps/cubeColor.jpg')
      tex3=loader.loadTexture('../models/maps/cornersColor.jpg')

      #the texture stages
      ts = TextureStage('ts')
      ts2 = TextureStage('ts2')
      ts3 = TextureStage('ts3')
      ts4 = TextureStage('ts4')

      #the texture stage blend modes
      ts.setMode(TextureStage.MModulate)
      ts2.setMode(TextureStage.MModulate)
      ts3.setMode(TextureStage.MModulate)
      ts4.setMode(TextureStage.MModulate)

      #defining which UV set to use for each texture stage
      ts.setTexcoordName("color")
      ts2.setTexcoordName("lightmap")
      ts3.setTexcoordName("color")
      ts4.setTexcoordName("lightmap")

      #the texture stage priority
      ts.setPriority(0)
      ts2.setPriority(1)
      ts3.setPriority(0)
      ts4.setPriority(1)

      #loading the cube model file
      cube = loader.loadModel('../models/cube.egg')
      cube.setScale(2)
      cube.reparentTo(render)
      cube.ls()

      #defining the geom nodes from the model file and their textures
      cube1 = cube.find('**/cube').setTexture(ts, tex3)
      corners = cube.find('**/corners').setTexture(ts3, tex2)
So I guess if anyone has any experience loading multiple textures onto a geom node, each with its own unique UV set, I would love to hear from you.
creating &/ exporting multitextured object from Maya, or
applying multiple textures on the fly
???
Use layeredTexture for the color channel. For each layered texture, use File for color channel.
Read my reply in Code Snippet.
How did you delete it ?
Is your model exported without textures ?
I blurry remember that UV set which is not linked to a texture would not be exported. Only the default get exported, whether it’s connected to a texture or not.
Check your egg, see if any exported UV set.
BTW, your code doesn’t do what should be done.
Color texture stage’s priority should be the highest, and the applied textures were wrong.
cube1 = cube.find('**/cube').setTexture(ts, tex3)
NodePath.setTexture() doesn’t return the nodepath.
      #loading the textures
      tex1=loader.loadTexture('../models/maps/lightmap.tif')
      tex2=loader.loadTexture('../models/maps/cubeColor.jpg')
      tex3=loader.loadTexture('../models/maps/cornersColor.jpg')

      #the texture stages
      ts = TextureStage('ts')
      ts2 = TextureStage('ts2')
      ts3 = TextureStage('ts3')
      ts4 = TextureStage('ts4')

      #the texture stage blend modes (the stages for the lightmaps)
      ts2.setMode(TextureStage.MModulate) # cube's lightmap
      ts4.setMode(TextureStage.MModulate) # corners' lightmap

      #defining which UV set to use for each texture stage
      ts.setTexcoordName("color")
      ts2.setTexcoordName("lightmap")
      ts3.setTexcoordName("color")
      ts4.setTexcoordName("lightmap")

      #loading the cube model file
      cube = loader.loadModel('../models/cube.egg')
      cube.setScale(2)
      cube.reparentTo(render)
      cube.ls()

      #defining the geom nodes from the model file and their textures
      cube1 = cube.find('**/cube')
      cube1.setTexture(ts, tex2, priority=1) # color texture
      cube1.setTexture(ts2, tex1) # lightmap texture
      corners = cube.find('**/corners')
      corners.setTexture(ts3, tex3, priority=1) # color texture
      corners.setTexture(ts4, tex1) # lightmap texture
Ideally (1), but since your script looked kind of complicated I decided to try (2) first for fun.
I tried to delete the extra UV set in the UVTexture Editor window (Polygons > Delete Current UV set). Unfortunately it appears that map1 is considered the default uv set and cannot be renamed or deleted.
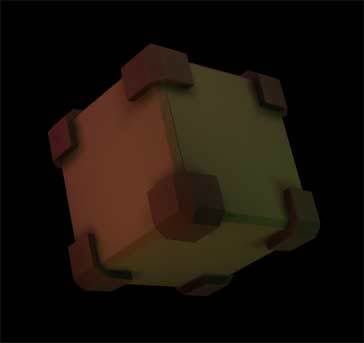
Anyway, I know the textures were incorrect because I swapped them to see if it had any effect. Like before, the color texture is only showing as a solid color (ie you can’t see the grain of the wood texture) but at least now thanks to your corrections, the lightmap is mixing with it properly. Thank you for your help.
so I guess my main issue is correcting the uv set for the color. I suppose using “map1” as my default color channel isn’t a big deal. And I guess your script will handle all of this on its own? Won’t I still have to implement the maps manually in python anyway?
??? It’s not for human consumption anyway, why bother ?
All you need to do is opening ScriptEditor, open the MEL, and save it to shelf. You just need to click the icon on the shelf.
If I still have to post-process it in Python, what’s the point of creating it ? Wasting my 2 days.
The thread title says it all :
Automatic lightmaps arrangement in Maya -----> export !
meaning : after rendering the lightmaps, click it’s icon on shelf, and then :
click Panda’s exporter icon to export the scene/object, or
type pview in Maya’s prompt, but first copy libmayapviewXX.mll from Panda3D\plugins to Maya\bin\plug-ins
Have you tried the experimental scene ? I believe you don’t need a tutorial to create the material.